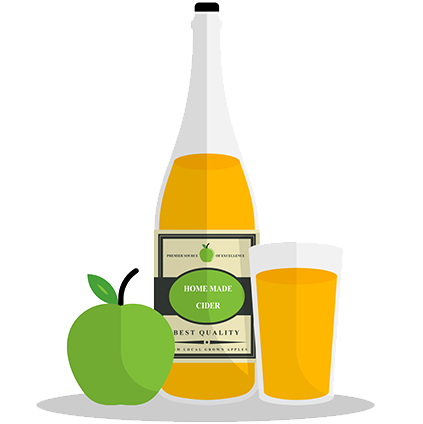
Make your own apple cider in 8 steps
Enjoy your own apple cider - and the making of it! Making apple cider is double enjoyment. Making your own cider is fun, drinking your own cider if possible even more fun. Natural cider is slightly alcoholic, at most 6.5%.
- Gather your ingredients and materials. You need quite a bit of gear to make cider. Do you think it's too much fuss? With a Starters Kit Making Cider Professional you get everything at home in one go.
- Cleaning products. Use the following:
• Sulfite powder & Citric acid Cleaning-set
• Puro-Oxi: cleaning agent for lightly soiled materials and bottles - Equipment
• Large (food)pan (that can safely hold 70° C liquids)
• Demijohn or fermentation bottle (at least 10 liters), preferably glass.
• Rubber cap or rubber plug with hole for airlock
• Airlock
• Hydrometer
• Muslin to squeeze out the pulp
• Siphon Blowable Collar + Faucet + Drip head
• Siphon clip to attach siphon hose to fermentation bottle or bucket
• Funnel (that fits into the Demijohn or fermentation bottle)
• Measuring glass
• Cider or champagne bottles
• Plastic champagne stoppers with iron wire cages
• Bottle brush - Ingredients
• Apples: In principle, all types of apples can be used, but it is preferable to use a mixture of varieties to obtain a better taste balance. For 10 liters of apple cider you need about 18 kilos of apples.
• Cider yeast: On average, one 10 gr. bag of yeast is sufficient for 10 to 20 liters of wine at one time. Opened bags have a limited shelf life.
• Sugar
• Pecto-Enzyme II: Ensures maximum flavor and juice yield
- Cleaning products. Use the following:
- Cleaning: ensure that all equipment is clean before you begin. This is important. It prevents infections, off-flavors and thus disappointments.
- Collecting apples, cleaning and pulping
Basically, all varieties of apples can be used for cider (We do advise you to use large sweet apples otherwise more sugar needs to be added). If you want an optimal flavor balance, use a mixture of varieties. Clean the apples well. You can leave the skin on, but remove the stalks and rotten or bruised spots and wash the apples well. Process the apples into pulp: First cut the apples into pieces and then crush them in a large foodpan or container. In addition to your materials, sterilize the pulp. To do this, use 1½ teaspoons of sulfite per 10 liters of must. Add Pecto Enzyme II. This will burst the cell walls of the apples and give you a higher juice and aroma yield. Mix the Pecto Enzyme well into the pulp and leave for 6-12 hours. - Squeezing the pulp and measuring SG
Use the muslin cloth to squeeze out the pulp. Collect the juice in the demijohn or fermentation bottle. Fill to no more than below the shoulder, as a lot of foam can form during fermentation. Rinse the muslin well after use, until all the pulp residue is out. Measure the SG of the pulp with the hydrometer. Pour some pulp in to the measuring glass and put in the hydrometer. The starting SG should be around 1050 for a cider with 6.5% alcohol, add sugar if necessary. - Fermentation
Put the demijohn at a warm place of about 21° C (NOT in the sun). Fermentation can also sometimes reach into the 26° to 32° C range. Pour the contents of the yeast bag over the must in the fermentation bottle, shaking the bottle gently so that the yeast is evenly mixed with the liquid. Fermentation will usually start within a few hours, but can sometimes take longer, and is usually finished when no more escaping bubbles can be seen in the airlock - Clarifying and siphoning
As long as the cider is still fermenting, it is not clear. Clarification occurs only after fermentation is complete. Clarification is faster in a cool place and is complete when a layer of sediment has formed at the bottom. After this, you can strain the cider into bottles. For this you use a siphon with a drip head. If you have the starters kit, it is included. You siphon the fermented wine into a clean bottle. - Bottling and secondary fermentation
Put an amount of sugar and/or honey in each (sterile) bottle to get fizzy cider. (You can also skip this step and make a still cider (without carbonation)). For a ¾ liter bottle, use 2 teaspoons of sugar or 3 teaspoons of (soft) honey. Note that the more sugar, the more pressure will be applied to the bottle. Seal the bottles with a plastic champagne stopper with an iron wire cage. After 2 or 3 weeks in a moderately warm place there is enough pressure on the bottles, put them away in a cool place. - Lagering and serving
You can drink your apple cider after two months at the earliest, but is actually not at its best until the following summer. You can't store cider for more than 2 years. The best place to store cider is a cool and dark place. Cider tastes best when served chilled. Avoid shaking the bottle. Open the bottle carefully and pour all the glasses full, without holding the bottle upright each time. The sediment at the bottom will then remain as untouched as possible.